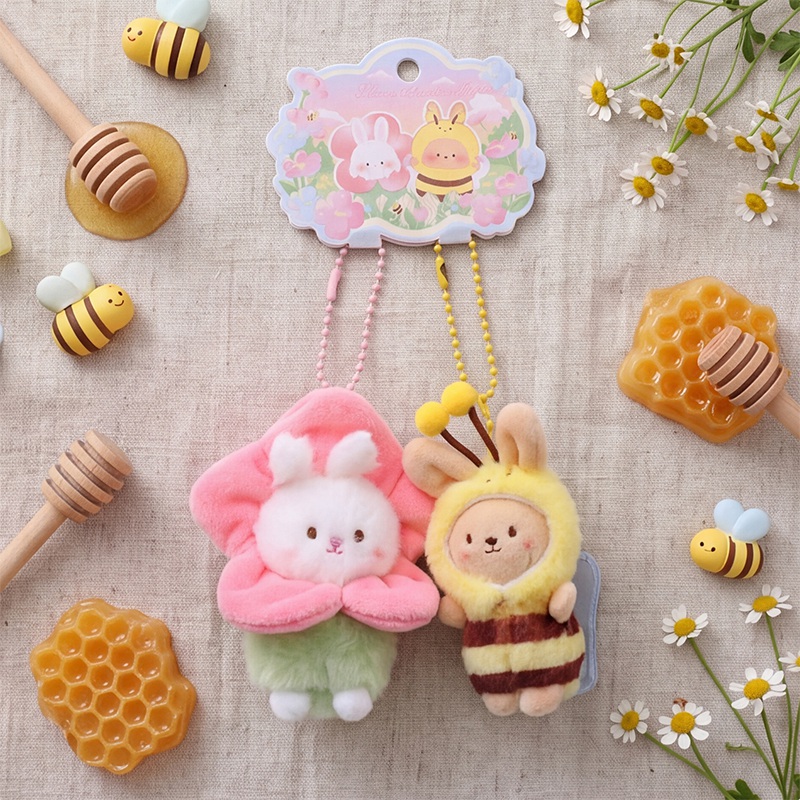
Head & body
Soft black short-pile candidates
Support a rounded head without losing the distinct cheek and body proportions.
Trial before choosing
Nap, stretch, visible seams under consistent light and filled-head shape.
Design & making notes / 02
Horned fantasy cat
Protect the sharp expression while building a soft, rounded character.
Free initial artwork review · first human reply within 1 business day
Before the construction
Compare the unchanged reference with the proposed drawing. Structure is useful only when it protects the character you recognize.
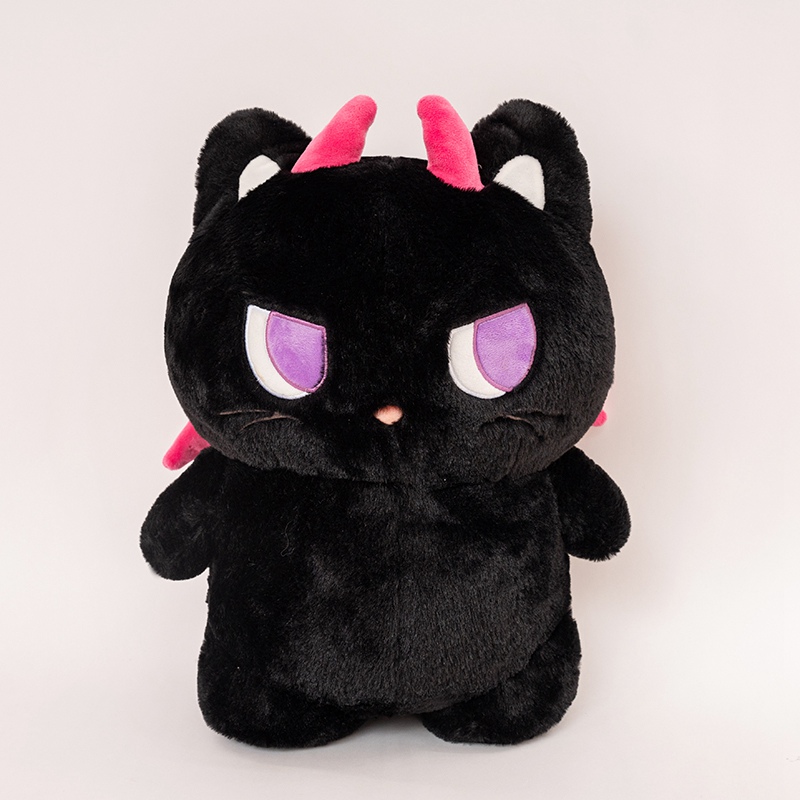
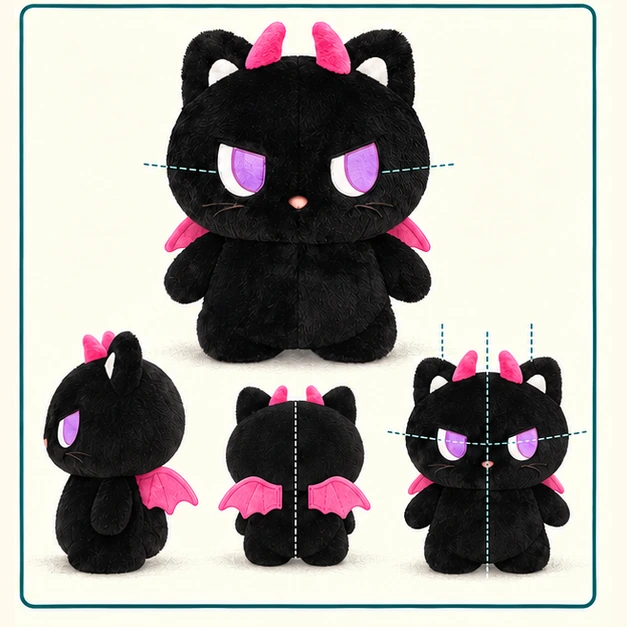
Views are cropped and scaled independently for reading, not measured overlays or an accuracy rating. These drawings communicate a development route; sampling still decides the final likeness.
01 / Look inside the idea
Four product-specific illustrations. Open a single drawing for a closer look, or compare the complete board.
Open all four drawings ↗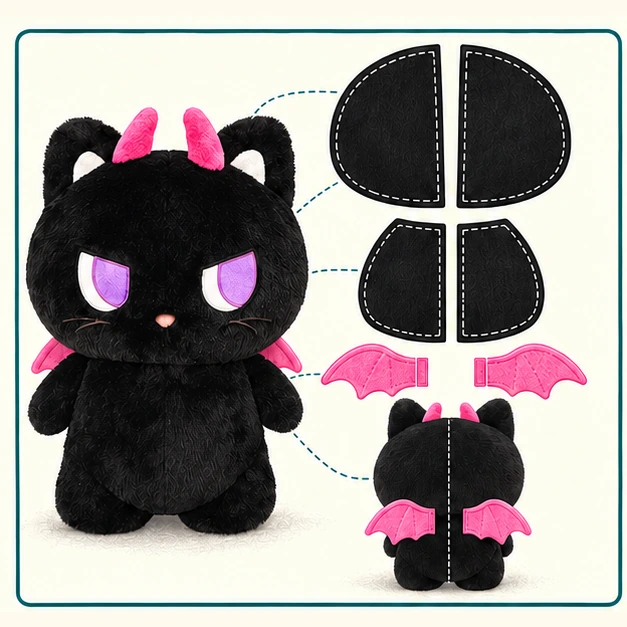
Separate the head, complete ears, horns, body and pink back wings without substituting a tail.
The rear wing contour is a proposed reconstruction. Series variants help identify the accessory family but are not extra views of this exact black cat.
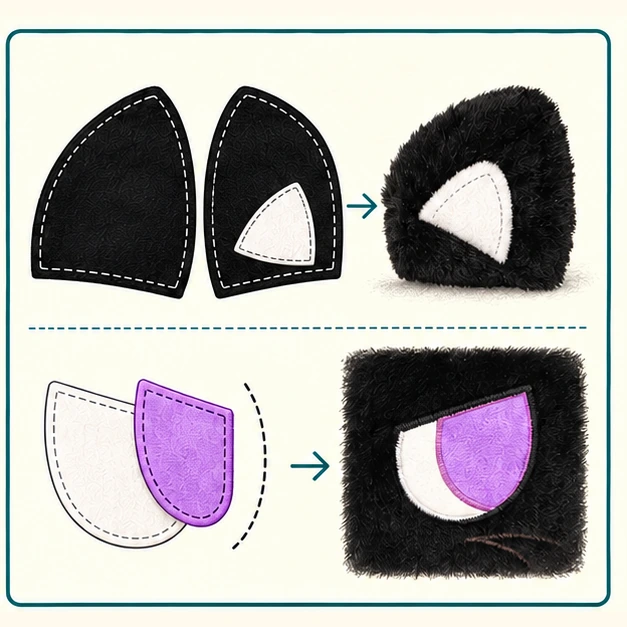
A white inset sits on a black ear-front panel; the black rear closes the shell. The eye has its own separate color-layer study.
Repeat the ear construction as a mirrored pair: four black shell panels and two white appliqués total. Do not draw a finished ear and an extra loose inner-ear set as additional parts.
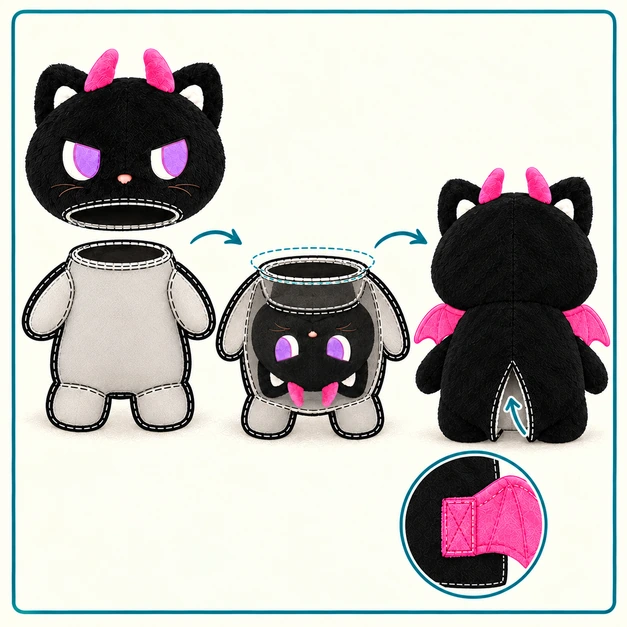
An unfilled right-side-out head nests upside down inside the inside-out torso; the neck ring is sewn before turning through the body back.
Read the three states left to right. Pale torso backing indicates the wrong side; its transparent cutaway only reveals the nested head. The oval at the top is the accessible neck ring, not an extra tube. The separate inset shows surface wing-tab attachment before body closure; the rear gap provides turning access.
Use front, side and proposed rear views to compare eye angles, head tilt, ears, horns and both wings.
A clean front view is not enough: inspect each wing tab and its attachment patch, then compare the head-to-body transition after filling.
AI-assisted concept illustrations, paired with product-specific design notes. Not production photographs, measured drawings or ready-to-cut patterns.
Solid outlines show conceptual cut edges; inset dashed lines indicate proposed stitching. A turning gap is a short unsewn section, not a virtual cutaway. Back views and internal details are development proposals, not unseen reference photographs. Diagrams explain relationships rather than executable geometry.
02 / Material map
These are candidate directions, not an inferred bill of materials or a stock promise.
Head & body
Support a rounded head without losing the distinct cheek and body proportions.
Nap, stretch, visible seams under consistent light and filled-head shape.
Eyes
Preserve the angled color boundaries without assuming dense full-eye embroidery.
Compare a full-embroidery trial for slope, softness, puckering and matched expression.
Ears & horns
Make a complete black ear shell while keeping the light inset as a surface layer.
Two ears require four black shell pieces and two white appliqué pieces in this route; check inset placement and root bulk.
Back wings
Retain the visible back accessory and make its connection accessible before the body closes.
Tab placement, rectangular attachment stitching, wing direction and bulk on the body-back trial.
03 / Construction choices
04 / Proposed making sequence
The practical sequence proposed for this design, with a checkpoint at every stage. This is not a record of past factory work.
Trace both eye angles, ears, horns, tiny nose and visible wing roots against the head and body landmarks.
Review: Back wings remain in the parts list even when mostly hidden by the front pose.
Compare the purple-and-white appliqué route with the full-embroidery alternative on the selected black fabric.
Review: Matched slopes, clean boundaries and no unintended stiffness.
Apply one white inset to each black ear-front panel, sew it to its black rear panel, then turn. Capture completed ear and horn roots in the head join while leaving the neck opening.
Review: Two finished ears come from four black shell panels plus two white appliqués, not duplicate or mismatched ear sets.
Complete the wings, lay their root tabs on the outside of the flat body-back panels and secure the rectangular stitch patches before shell closure. Add limbs and keep the rear turning gap and neck ring open.
Review: The tab lies on the panel surface; it does not have to reach or disappear into a center-back seam.
Keep the unfilled head right side out and the body inside out. Insert the head upside down into the body so the open neck edges meet with right sides facing; align front/back landmarks and sew the neck ring. Turn through the separate body-back gap, then fill.
Review: Do not fill first. The head fits through the selected turning route, both neck edges are reachable, and ears or horns are not caught in the ring.
Check the eye line, paired ear and horn positions, head direction and wing roots before closing the rear opening.
Review: Review the requested resting pose without turning a front photo into a standing-performance claim.
05 / Sample review
Appearance and function checkpoints for this concept. They do not establish product safety compliance or replace any required testing.
The original slanted purple-and-white eye geometry stays recognizable on the curved head.
Two ears, two horns and both wings appear consistently; the white ear inset is appliqué, not a replacement rear shell.
Wing patches precede body closure, the neck ring precedes filling, and the rear gap remains usable for turning.
Wing tabs can be inspected and the chosen head direction does not rely on an invented rigid frame.
No exact size, cutting pattern, material composition, filling weight or test result is reconstructed from this photograph.
General methods inform the proposal. These links do not establish the pictured product’s manufacturing history or any Kinhatch certification.
Terminology, darts, curved seams, fabric direction and appliqué principles; not a pattern for any pictured character.
A different cat project illustrating face work, ears, head panels and a hand-attached head route; not the selected neck-ring route or proof of this cat’s construction.
Fabric-supplier guidance on pile, stretch, handling and seam control; product-specific fabric settings require trials on the chosen material.
A different animal showing paired ear assembly and an unfilled neck-ring join with a separate turning opening; a construction analogy, not a matching product record.
Your character comes next
Which matters most to your character: the eye attitude, horn position or wing outline, and how should the finished plush rest?
Send your artwork for a free initial review. First human reply within 1 business day; physical sampling is a separate paid step.
Explore another construction challenge